Copyright © Acorn Publisher & Qercus.
www.qercus.com
WebWonder is a new web-site creation package for RISC OS. It's been created by David Snell who's also the author of the brilliant computer aided design software, ProCAD+. WW fills in a gap for our market. It's our only WYSIWYG web-site editor to be actively developed, so it will be interesting to see how it performs.
For a long time I've heard many RISC OS users sing the praises of David's ProCAD+. His reputation as a competent software developer made me excited about the prospect of his latest creation.
First, let me explain why WebWonder is so different to all the other tools currently being developed and marketed.
Most web-sites are constructed using a fairly simple language called Hyper-text Mark-up Language (HTML). HTML allows you to do lots of different things with text. Some basic HTML would allow you to set some text to a particular size and colour, align the text to the left, centre or right. You could make some text link to another web-site or to an e-mail address. There are plenty of other things HTML can do with text, as well as graphics and other media. I'll assume you're all familiar with the basic conventions of the web so won't go into further detail.
Normally you'd have to learn the language that I've described. You'd have to learn all the commands to manipulate text and graphics and play with them to achieve the design you were after. If you're going to be producing a web-site with lots of features, like tables and forms, or if you don't consider yourself a particularly technically-minded person, this can be a daunting task. But with WebWonder we have a tool that allows people to create HTML web-pages without any need to learn the language itself.
Most of you will have used a desktop publishing package (DTP) at some point. OvationPro is a good example. OP allows you to place text on a page alongside images. It allows you to set the colour of the background and of the text. In fact, it can do many of the things that HTML allows you to do for web pages. WebWonder allows you to do these things for web-pages in an environment you're familiar with - while it worries about the HTML. It allows you to be creative without having to worry about what's going on underneath.
I've had several year's experience using HTML. I, therefore, understood, before getting WebWonder, the concept of the relationship between text, images and links on a web-page. I wanted to see how WW would cope with what I was about to throw at it.
Several days before I obtained WW I had created a new logo for a project I had been working on. I'd also written some text ready to go onto a simple web-page. Here's how I got on:
WebWonder had arrived, I'd installed it on my RiscPC following the instructions in the manual. WW loaded onto the iconbar and I clicked onto its icon. Because WW contains a site management system, the first thing the user is requested to do is save a directory onto their hard disk. I named the directory and dragged it over to an appropriate location. This is a feature that I know will be important to beginners. It's vital, for the sake of good web-site management, that you keep all the files for a particular site in one place. The WW manual refers to these initial directories as the site's root directories. Within this, many sub-directories might eventually be created for images and different parts of the web-site.
WebWonder Site Management consists of a filer similar to the normal RISC OS filer we use to view our files and directories. However, this special filer allows the user to open all the files that are associated with a particular web-site. It allows one's files to be published to the Internet at the click of a button. And if one tries to double-click an HTML page it loads them into WebWonder's Page Editor.
Figure 1: WebWonder Site Management
We'll start with a blank page in the Page Editor. Without even glancing at the WebWonder manual most of the tools at the top are instantly recognizable. We have all of the tools necessary to allow you to manipulate text and graphics. It also has some tools that you won't find in desktop publishing. It has, for example, a tool which creates hyper-links to other pages.
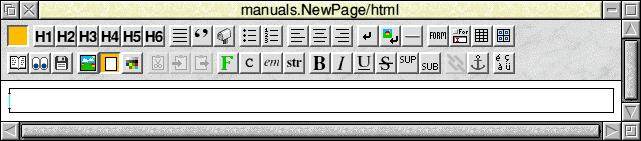
Figure 2: WebWonder Page Editor
So, to return to the job in hand. By applying my existing knowledge of web-pages and DTP, I easily created my first page. However, I'm a bit of a naughty user because I like to play with programs before I've read the manual. I achieved much of the following without consulting the manual.
Using the content I had created earlier, I selected and dragged my writings from a text file over and into the WW Page Editor. As I would in DTP, I formatted the text to my liking. I created several paragraphs out of the text, aligned some text to the left, made titles bold, centred some items, and so on. The ease with which I did this proves the program's intuitiveness and shows off its roots in DTP.
To add a little colour to my first page I thought I'd add an image or two. I tried dragging an appropriate image from the RISC OS filer. My first error message appeared, "Images may only be imported from within the site". It's when one get errors like this, one realizes that reading the manual is the most sensible idea. I soon discovered that all images must first be be copied into the special WW filer. There is also, by default, a special directory for images within the WW filer. This builds on what I consider to be a strong feature of the program; it forces people to keep all of their files in one place. I, of course, should have known better: I should have read the manual and, if I'd followed my own rules of keeping relevant files in the same place, it would have been a logical procedure to have first copied my image files into the site's root directory.
After that small hurdle, I dragged the first image into the document from the WebWonder filer. At this stage WW asks you to set various properties for the image. For example, you can create a border around the image and choose the alignment of the image in relation to the text. After pressing 'OK' the image was inserted into the page. I then moved it around a bit until I'd decided on the most appropriate alignment and position.
The next important task was to create some hyper-links. For now the web-site would only consist of one page, but I still needed to link to other people's web-sites, as well as providing e-mail links so that people could contact me. As I had suspected, it was a simple job of selecting the relevant text on my page and then clicking on the link symbol on the toolbar. WW then allows you to specify the sort of link you require; a link to a local page (i.e., another page within your own web-site), a remote link (i.e., someone else's web-site), or an e-mail link.
After creating all of the required links and playing around with some other features within WebWonder, my page was complete. By default this page would become my home page (i.e., the first page visitors would see). Following instructions I entered the details of my ISP (where I would be hosting the web-site). And at another click of the mouse my web-site had been successfully published to the web. WW uses the elegant RISC OS FTP program, !FTPc, to upload the files, and it somewhat automates this process. Again, this is a feature which will appeal to beginners.
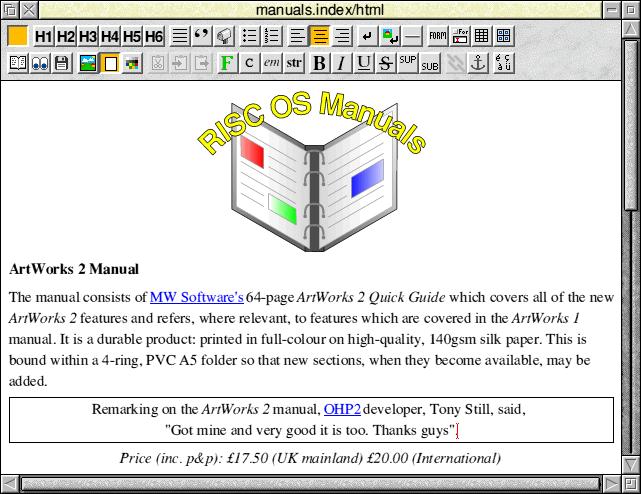
Figure 3: My completed web-page in the WebWonder Page Editor
This had been the first time I'd used WebWonder. The whole process of pasting a page together, creating links and publishing to the web had taken literally minutes. I was also pleased that the page appeared in my web-browser in the same way as the WW Page Editor.

Figure 4: My completed page in Oregano2
WebWonder has many other features to explore. For example, its ability to create forms and tables - tables, as the beginner will soon realize, are a powerful way of controlling the design of a page. Another useful time-saving feature is the contact sheet tool. This allows the user to give WW a directory of images in order to create a gallery of small images (often known as thumbnails). It places these images within a table on a web-page. When displayed in a web-browser, you can click on a particular thumbnail to load a corresponding larger version of the image.
WebWonder was certainly created with the beginner in mind: it is an ideal product for anyone who wants to create a web-site but has no experience at all. A 64-page printed manual is supplied with the program. This holds your hand while explaining what the basic concepts of the web are and leads you gently into managing your files and using the Page Editor to create and manipulate web-pages. It also takes you through to the final step of publishing them to the web.
A criticism of web-site creation tools like WW has been that the HTML they produce is bloated with unnecessary code. I can't say that this is a problem at all for WW. Its code is both clean and fairly easy to read, as if coded by hand. For this reason, and its ability to save time in pasting a simple page together, allowing you to concentrate on the content rather than the code, I consider WW a useful tool even for advanced users of HTML.
WebWonder uses HTML version 3.2, so the pages it creates will work on all the major RISC OS browsers, as well as those on other platforms. It does, however, include features from later versions of HTML. On the whole, because it uses this older version of HTML, some of the newer features like frames cannot be used within WW. This is certainly a limitation which needs to be addressed. It will be interesting to see how the program develops, hopefully including more commands from these later versions in the future.
It's difficult to be critical about WebWonder. It certainly is one of the programs that 'does what it says on the tin'. David Snell is actively developing the program and is issuing updates to users. It has a promising future and it will be interesting to see how this pans out.
![]()